Tuesday, October 26, 2010

Photo Key Fob

Key Fob 022


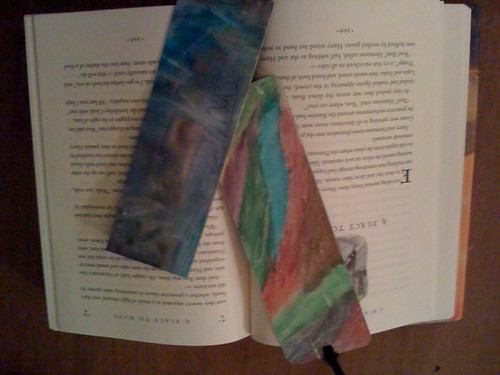
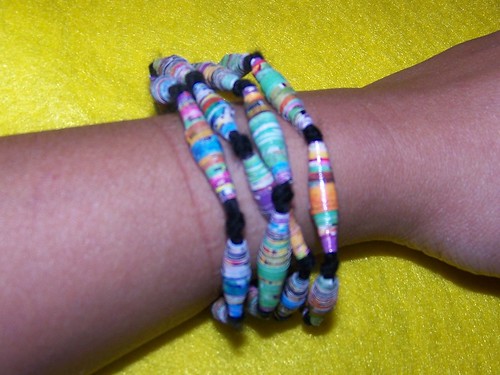
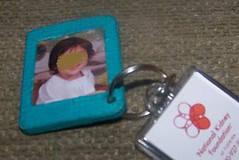
Continuing on last week’s challenge theme, I chose used gift cards to be the subject of this week’s RETROCRAFT project.  All week long, I considered different ideas to incorporate gift cards.  I initially considered making wallet sized picture frames out of my old gift cards.  But a last minute change of plans transformed my picture frames into photo key fobs.  A few years ago, my son’s school photos included laminated photo key tags that I proudly display on my key chain.  Going through my keys, I realized that my son’s photo was several years old.  My creative light bulb went off at that moment and my new idea was born. 

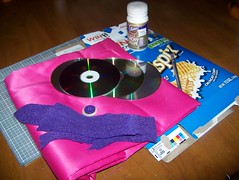
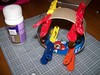
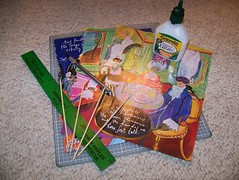
To get started you will need:
Key Fob 001
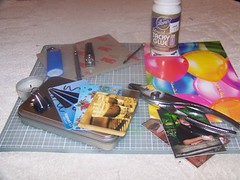
2 used gift cards or hotel card keys
A ruler
A craft knife
Pliers
Nail clippers
Fine grit sandpaper
Envelope with a clear window or ziplock bag
Photos
Glue
Craft paper
A ¼” wide nail
A candle or tea light
A lighter to ligth the candle
4 medium binder clips or clothespins
Marker or pen
A key ring

Key Fob 006Key Fob 002
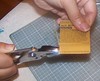
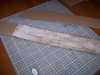
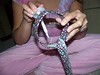
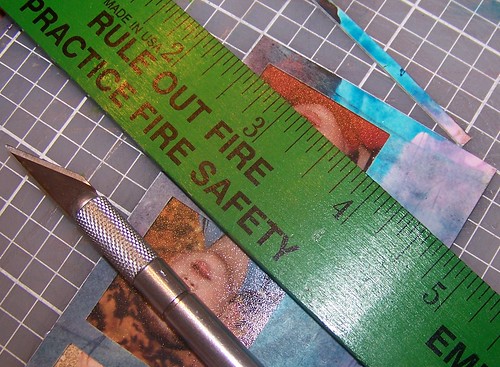
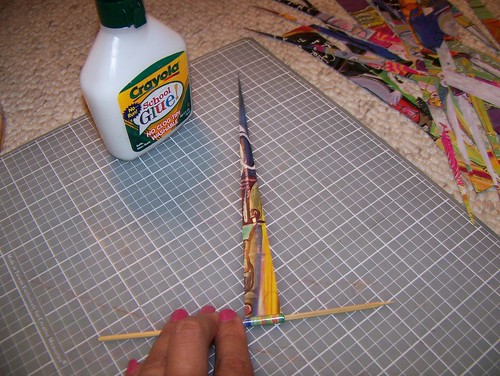
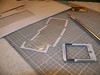
1.  Measure the length of one gift card and determine the center.  Cut the gift card in half using your craft knife and ruler (as a straight edge).  You will need to make several passes with your craft knife.  After making several passes, you can fold the gift card along the score line to snap it in half.  After breaking the gift card in half, match the uncut edges and confirm that each half is the exact size.  (It might help to clip the halves together.)  If necessary, trim the wider half to match the other.  If you’d like to snap off any excess, it might help to use pliers to hold onto the excess edge.

2.  Cut the other gift card in half just as you did in step 1.  Take one half of this second gift card and size it with the halves you cut in step 1, in the same manner described in step 1.  (The other half can be retained to make a second key fob or can be recycled.)

3.  Round the square edges of these gift card halves.  Using a nail cutter is the best way to do this.  Again, make sure the rounded edges of the gift card halves match.

4.  Use the sandpaper to clean and smooth the cut edges of each gift card half.  Stack the three (3) halves and make sure all match. Mark the outside face of the half that is on the top of the stack and mark the outside face of the half that is on the bottom of the stack.  These will be the “right” sides for future reference. 

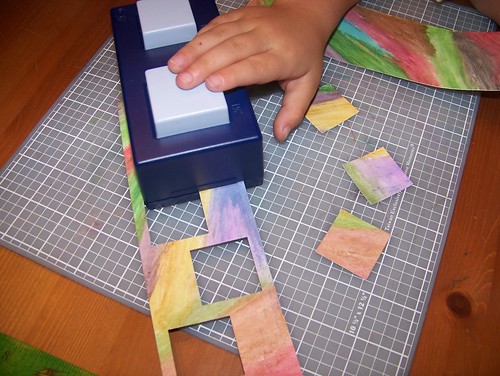
5.  Take the top gift card half from the stack and cut a square window into the center using your craft knife and straight edge.  When you cut the window, make sure you leave a ½” space at the bottom of the half.  You will need this space to create the hole for the fob.  It will take a number of passes with the craft knife to cut the window.  The sharper your craft knife blade, the better.  As you cut the window, make sure that you are still able to identify the right and wrong sides of the card half.  After window is cut, recycle the center portion and use the sandpaper to smooth the edges.  Be sure to remember that this gift card half was the top of your stack.

6.  Repeat step 5 with the gift card half that is at the bottom of the stack.   Be sure to remember that this gift card half was at the bottom of your stack.

Key Fob 016
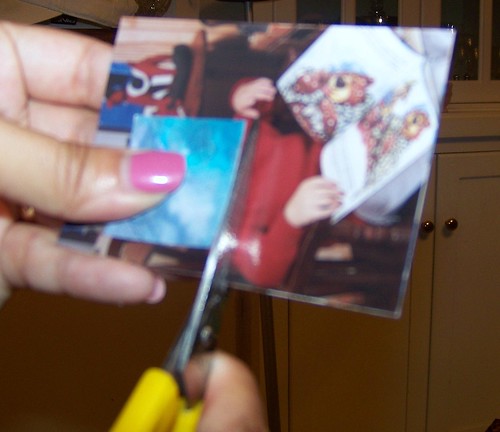
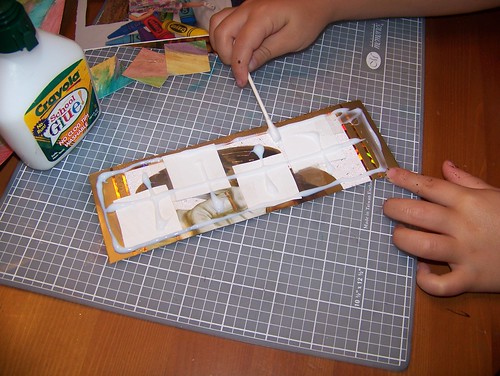
7.  Cut the window from an envelope into sections that will adequately cover the windows that you cut into the gift card halves.  (If you don’t have an envelope window, you can also cut the clear portion a ziplock bag.  With the right side of each gift card half facing downward on your work surface, put a thin line of glue around the edge of the gift card windows.  Adhere each section of envelope window to each gift card half.

8.  Cut your photos to size so that your desired image will show through each gift card window.  Using the gift card that was in the center of the stack you put together in step 4 (the one that does not have a window), glue your photos to each side.  When placing the photos, keep in mind that when you stack the gift cards halves again, the photos should show throw the windows.

Key Fob 019Key Fob 020
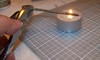
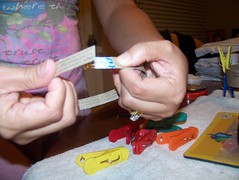
9.  Place the “top” gift card from step 5 on a well protected work surface, right side down.  Holding the nail with pliers, heat the 1” tip of the nail in the flame of your candle.  After heating for 1 minute, use the heated nail to bore a hole in the corner of the top gift card half.  Be especially careful with the nail because it will be hot; be sure that you hold it with the pliers while it is heated.  It is a good idea to keep a cup of cold water close by.  You can drop the nail into the water to cool it quickly.  Use your craft knife to clean the edges of the whole and remove any excess plastic.  On both sides of the card, you want to make sure the area around the hole is flat and not raised.

10.  Match the photo gift card half from step 8 with the top gift card half from step 9 (right side up).  Clip together with binder clip or clothespin.  Using a pen or marker, mark the position of the hole so that you know where to bore the hole into the photo gift card half.  Follow step 9 with the photo gift card half.  (Make sure the photos you adhered to this gift card half are cut so that the area where the hole will be bored is not covered by any part of the photos.)

11.  Match the top gift card half from step 9 with the bottom gift card half from step 6, matching wrong sides to wrong sides.  Again, using a pen or marker, mark the position of the hole so that you know where to bore the hole through this third gift card half.  Follow step 9 with the bottom gift card half.

Key Fob 011
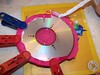
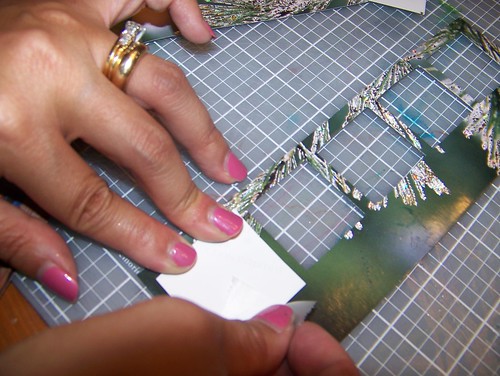
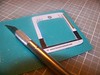
12.  Apply a thin layer of glue to the right sides of the top and bottom gift card halves from steps 9 and 11.  Adhere the right sides of these gift card halves to the wrong side of your craft paper and let dry completely.

13.  When the glue is dry, carefully cut the excess craft paper away from the gift card halves.  Cut the craft paper away from the windows as well.  If you do not wait until the glue is dry, the paper may become jagged as you cut.  Using your craft knife and/or the cold nail, bore holes into the craft paper to matcht the holes you made into the gift card halves.  Try to cut any excess paper away from the holes. 

Key Fob 02114.  Stack the gift card halves to make your fob.  The paper should be on the outside faces, the photos should show through the windows and the holes should match up.  Glue the cards together and clip together using the binder clips or clothespins.  Let dry completely.

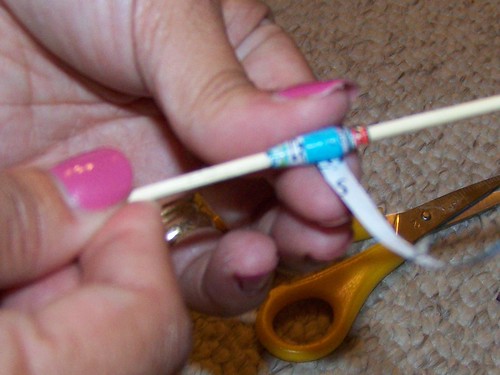
15.  Cut a strip ¼” wide at least 10” long.  Glue the strip along the exposed edge of the newly formed fob.  Cut away any excess with your craft knife. 

16.  Apply a very thin layer of glue to the paper on the top face of the fob and the paper covered edges.  (Do not apply glue to the windows.)  Let dry thoroughly.  When the top face is dry, apply a very thin layer of glue to the paper on the bottom face of the fob and let dry throughly.  The glue in this step is meant to create a decoupage effect and a protective layer that will stiffen the paper.

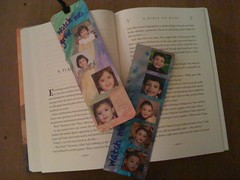
17.  When completely dry, you can place your fob on your key ring!

TIPS:  Technically, you could make this craft with heavy cardboard.  However, I think that gift card plastic will be much more durable for every day use.  This craft can utilize old photos for which you might not otherwise have a use.  However, in lieu of photos, you can use clip art.  Before applying the glue in step 16, you could embellish the faces of the fob.  For example, you could use mini-alphabet stickers to spell the names of those people whose images are in the photos you have a selected.

Because of the use of the nail, candle and craft knife, this project is not appropriate for children.   But even without the help of my children, I had a lot of fun creating this week’s project.  It did take some time and I now need to replace my craft knife blade.  Nevertheless, it was fun to watch these gift cards transform into such a practical item!

Monday, October 18, 2010

Jewelry/Keepsake Box

Jewelry Box 019

This week I approached my blog in a different way.  Rather than conceive the project and determine what recyclables I could use to create my craft, I started first with the recyclable and challenged myself to come up with craft ideas.  I’ve had a stack of old CDs piled up on my dresser for the last few months.  I had no reason to keep them but no reason to toss them either.  So, I asked myself, what could I do with CDs?  After mulling around a number of ideas, the idea of a jewelry box sprang to mind.  I was eager to get started, to see if my idea would really work.  Thankfully, the model turned out better than I expected.  It was so good, I made another!  Believe it or not, these boxes are made out of CDs and a cereal box!  

To get started, you will need:
Jewelry Box 002
A cereal box or other similar cardboard box
A craft knife
A self-healing craft mat or thick cardboard
Glue
10-20 Clothes pins or binder clips
18” x 18” piece of fabric
Scissors
4 compact discs or DVDs
Additional fabric or felt for embellishments
Decorative buttons
Needle and thread (colored to coordinate with fabric or buttons)

1.  Open the cereal box (you may need to cut the box along one edge) and lay it flat on top of your self-healing mat.  Using the craft knife and a straight edge, cut the cereal box to create two 13” lengths.  You can determine the width of the lengths; the width will determine the height of the box.  For this project, I cut each length to a 2” width.  (If you cannot create one length of 13”, you can make one 13” length by taping together two 6 ½” lengths.)

2.  From the remaining cereal box cardboard, cut two 12” lengths of ½” width.  (Again, if you cannot create one length of 12”, you can make one 12” length by taping together two 6” lengths.)

Jewelry Box 0033.  Apply glue to wrong side (the colored side) of one 13” length, making sure not to apply glue to the first 4” of the length.  Place the other 13” length onto the glued portion of the other 13” length, matching wrong sides together.   At this stage, 4” at each end will remain unglued.   Clip the cardboard together using the clothes pins.  Repeat with the 12” lengths.

4.  Cut four 6” x 6” squares from the fabric.  Starting with one CD, apply a thin layer of glue around the top edge of the unlabeled side of the CD.  Lay the CD, labeled side up on the wrong side of a fabric square.  Repeat with the remaining three CDs. 

5.  Starting with the first CD that was glued to the fabric, use the scissors to trim the fabric into a circle around the CD.  When trimming, make sure there is ½” to 2/3” of excess fabric around the CD.   Clip the excess fabric at every ½” around the CD to create a fringe.  Repeat with the remaining three CDs.

Jewelry Box 0166.  Start again with the first CD.  Working in sections, apply glue to the fringe and fold the fringe over the edge of the CD.  Clip with clothes pins as you work if needed.  (You can probably use the clothes pins used in step 3 above.)  Repeat with the remaining three CDs.

Jewelry Box 015Jewelry Box 0047.  Return to the cardboard lengths.  Starting with the 13” length, apply glue to the 4” reserved at one end.  Form a cylinder with the length, overlapping the newly glued section with the 4” at the other end.  Use a clothes pin to hold the ends together.  Repeat with the 12” length.

8.  Cut the remaining fabric to create one 13 ¼” length.  The width should be 1” wider than the width of the 13” length of cardboard you cut in step 1.  For the model, I used a 3” width.  Cut a second 13 ¼” length; the width should be 1/4” smaller in width than the width of the 13” length of cardboard you cut in step 1.  For the model, I used a 1 ¾” width.  (It is important that this second 13 ¼” length is cut straight.)  Cut a second length of fabric, 12 ¼” long x 1” wide.  Cut a second 12 ¼” length; the width should be just shy of ½”.  (Again, it is important that this second 12 ¼” length is cut straight.) 

9.  Go back to the larger cardboard cylinder that you made in step 7.  Center the 3” wide length you made in step 8 over the outer edge of the cylinder.  Apply glue to the end of the 3” wide length to adhere it to the cylinder.  Wrap the fabric around the cylinder.  Apply glue to the other end of the fabric and adhere it to the cylinder, overlapping the fabric.  There will be approximately ½” of excess fabric at each end of the cylinder.  Repeat the same with the smaller cardboard cylinder, using the 1” wide strip of fabric.

Jewelry Box 00810.  Returning to the larger fabric covered cylinder, clip the excess fabric at each end of the cylinder at every ½” to create a fringe.  Working in sections, apply glue to the fringe and fold the fringe over the edge of the cylinder.  Clip with clothes pins as you work.  (You can probably use the clothes pins from step 6.)  Repeat with the smaller cylinder. 

11.  Return to the CDs.  Take two CDs and glue the wrong sides together. 

Jewelry Box 010Jewelry Box 00912.  If desired, you can create an embellishment from other fabric or felt and sew onto the center of the right side of one of the remaining CDs.  For this project, I made flower petals from purple felt and sewed them into a flower shape using coordinating buttons to anchor them in the center.  I then sewed the flower onto the CD.

13.  Glue the embellished CD onto the remaining CD, gluing the wrong sides together.  This will be the top of your box.

Jewelry Box 01714.  When the cylinders in step 10 are dry, lightly coat the inside with glue and cover the inside with the remaining fabric lengths you cut in step 8, using the wider length for the larger cylinder and the narrower length for the smaller cylinder.

15.  Apply a line of glue to the edge of the larger cylinder and adhere the cylinder to the CDs you glued together in step 11, centering the cylinder over the CDs.  To ensure a good bond, you can a lay book on top of the cylinder.    This will be the bottom of your box.  Do the same with the smaller cylinder, adhering it to the unembellished side of the CDs you glued together in step 13.  This will form the lid of the box. 
Jewelry Box 011

16.  When dry, your box is ready to fill!  The lid should fit snuggly onto the bottom of the box. 

TIPS:  If your fabric is wrinkled, be sure to iron it before use.  You can created a tufted look for the box lid by adding a thin layer of foam or batting between the CD and fabric that will form the top of your box.  I did this for both models I made.  I also found that hot glue applied from the inside of the box and lid works best in step 15.

Jewelry Box 014
This craft is best done by an adult.  A child can help with certain steps.  My daughter helped with the gluing in step 6.  However, the steps need to be followed precisely, making this craft very difficult for little ones.  I suggest you review the steps and the photos a couple of times before starting with this craft to ensure that you are familiar with all the steps.  This craft does take some time (it took me 1 ½ hours to complete each box) making it a perfect project for a lazy afternoon.  

Enjoy!

Monday, October 11, 2010

Watch Me Grow! Bookmarks

IMG_0688

IMG_0689The holiday season will soon be upon us and that means that my mailbox is sure to receive a number of holiday cards sending well wishes and news of the last year.  Greeting cards are a great source of card stock for a variety of art projects.  I reserved cards from last year and was recently wondering what I would do with them.  My daughter's fall photos just came home from school the other day and this sparked an interesting idea.  Every year I order my kids' school photos to share with the family and wind up with much more than I need.  Although I am now opting to order downloadable images, I still have several years worth of wallets tucked in a shoebox in my closet.  I've been waiting for a chance to use these photos and this week's RETROCRAFT project is that perfect opportunity.  I gathered several years worth of school photos for each of my kids to make bookmarks that will depict a short history of their growth over the last 4 to 5 years.  Watch Me Grow! bookmarks make creative practical gifts that grandparents, aunts, uncles and other family members will enjoy using at home or at work!

To make one bookmark, you'll need the following:

100_1769A greeting card, blank, matte and unembossed on the inside cover
A scissor
Watercolors
Washcloth
A craft knife
A ruler
A craft mat or thick cardboard
Square or circle craft punch
4 or 5 photos
Tape
Glue
Cotton swabs
Two large, heavy books
Hole punch
Yarn or colored string, as desired
Marker

1.  Start by separating the greeting card in half, along the fold, using a scissor.  Retain the half with a blank, unembossed side.  Recycle the other half.  TIP:  The larger the greeting card used, the larger the bookmark.


100_17702.  Lay the retained card half on a washcloth or craft mat, with the blank side up.  Paint the card with watercolors, making any design and using any combination of colors you wish.  Dry completely.

3.  Cut the card, lengthwise, into two lengths of equal width.  Put one length aside.


100_17714.  Use the craft punch to cut squares or circles into the remaining length.  By doing this, you are making "windows" for your photos.  Place the windows along the length wherever you desire and space as you wish.  (If you don't have a craft punch, you can easily cut square windows using a ruler and craft knife.)  Cut as many windows as images you would like to use, length permitting.


100_17785.  Cut the desired images from your photos using a scissor.  The cutout should be slightly larger that the opening of your windows.  (You can use one of the squares or circles you punched out in step 4 as a guide.)  Remember that the images you use should be small enough to be seen through the windows.  For this project, wallet size photos are perfect.


6.  Lay the length, painted side down, on your work surface.  Tape your photo cutouts into place, over the windows, image side down.  For this project, you want to put the photos in age order.  For my sample, I arranged the photos from top to bottom starting with the most recent to the oldest.

100_1776100_1784
7.  Move the length, painted side down, onto the lower half of your washcloth.  Apply glue to the backside of the length.  Use a cotton swab to spread a thin layer of glue over the entire backside, being sure to cover the edges and corners.  Do not use too much glue! Remove excess glue with a cotton swab.

8.  Now cover the glued length with the length you put aside in step 3, matching backside to backside and edge to edge.  Smooth the lengths together to sure a complete bond.  Glue may squeeze out from the edges.  Use a cotton swab to remove excess glue.

9.  Pull the top half of the washcloth over the bookmark and put the wrapped bookmark between two heavy books.  (My daughter stood on the books while painting other cards.)  The even weight helps ensure a good bond while the glue is drying.

100_178610.  When the bookmark is completely set, use a ruler and craft knife to clean up any edges, particularly when the back and front lengths do not match up perfectly.

11.  Using a marker, you can write the words "Watch Me Grow!" anywhere you would like on the bookmark.  If you aren't fond of your writing, you can use alphabet stickers.

12.  If desired, when the glue is dry, punch a hole at the top of bookmark, making sure to center it.  (If you don't have a hole punch, you can cut a narrow slit using a craft knife.)  Take several lengths of yarn or string and fold the lengths in half.  Insert the folded ends through the hole at the top of the bookmark.  Thread the loose ends of yarn through the loop created when the folded ends are passed through the hole.  Gently pull the loose ends through the loop to loosely knot the yarn around the bookmark. 

For a more finished look, you can laminate the bookmark after step 11.  (You may need to skip step 12 since it may be difficult to punch or cut through the laminate.)  You can also use a corner rounding photo punch if you want to round off the corners of your bookmark. 

Other ideas:  You can preserve interesting quotes from greeting cards as a bookmark.  Instead of adding it to your recycling, you can paint and cut the portion of the card containing the quote and use it in lieu of the length that you would otherwise use to make your photo windows.  You can also use this idea for other keepsake gifts.  Use extra photos from your wedding to make bookmarks for your wedding party.  Pictures of a newborn can be used to make a different kind of birth announcement.  The possibilities of this craft are endless and depend only on your imagination.  And, as long as you supervise some of the cutting and gluing, your kids can join in the fun.  Happy crafting!

Sunday, October 3, 2010

Mazagine Jewelry Beads

arts & crafts 036


In my house, each of us has a magazine subscription or two.  That makes for a lot of paper.  Over time that's a lot of trees!  Luckily, my neighborhood does recycle and I make sure that nearly all of the paper in my home finds its way to my recycling toter.  But a lucky few get to live a new life as jewelry.  What?  Say that again?  Jewelry?  It's hard to picture I know.  But once you learn this simple craft, you'll find that magazine jewelry beads are not only easy to make but fun to wear.  It's a great gift idea for kids who want the real thing but are too young to be responsible with the real thing.  And, because this is so easy to do, this is a perfect craft for the young ones in your family. 


arts & crafts 027To get started, you will need:
several sheets from a magazine
a craft mat or thick cardboard to work on
a ruler and a craft knife
school glue or a glue stick
Q-tips
several thin skewers, and
yarn or string


arts & crafts 0331.  Place your magazine sheet on a craft mat.  (If you don't have a craft mat, use a thick cardboard to protect your working surface.)  Using the ruler as a straight edge, use your craft knife to cut each magazine into strips in the shape of narrow, symmetrical triangles.  (If you don't have a craft knife, you can use scissors.)  The length of your bead will be determined by the width of your strip.  The longer your strip, the fatter your bead will be.  One strip makes one bead.

arts & crafts 0282.  Place a triangle strip on your craft mat with the point facing away from you.  Starting 1 to 1 1/2 inches from bottom edge of the triangle strip, run a very thin line of glue along the length of the "wrong side" of the strip.  (The wrong side is the side of the strip that will not be visible when making your bead.)  Use a Q-tip to smooth the glue along the length of the strip.  Be sure that you apply glue to the point.  Do not use too much glue. 

arts & crafts 0293.   Lay the skewer near the bottom edge of the triangle strip.  Fold the bottom edge of the triangle strip over the skewer and slowly roll the strip tightly around the skewer.  Be careful to keep the strip centered as you roll.  As you become better, it will be easier to keep the strip taught and centered by turning the bead between your thumb and index finger. 

arts & crafts 0344.  As you roll the bead, wipe away any excess glue with a Q-tip.  Lightly dampen the Q-tip and remove any excess water before using the Q-tip to prevent any cotton from sticking to the bead.)  This is an important step.  Excess glue on the bead or on your hands dulls the color and appearance of the bead.  For little ones, consider using a glue stick in step 3 so that you can skip step 4 altogether!

arts & crafts 0355.  You can roll several beads on the same skewer, but make sure your hands and the skewer are free of any glue.  You will need to use more than one skewer; the number of skewers depends upon the number of beads you want to make.  For best results, allow the beads to dry for 15-30 minutes.


arts & crafts 0316.  Once dry, carefully slide the beads from the skewers and string the beads onto string or yarn.  If you are having difficulty stringing your beads, use a yarn needle.  If desired, you can tie knots between the beads.  Keep adding beads until you reach the desired length for the piece you are creating and tie the ends to finish!  Your beads are ready to wear!


TIPS:  You can increase the width of your bead by using thin pencils or dowels instead of skewers.  To give your beads a more polished look, you can spray them with shellac or apply clear nail polish after the beads are dry but before you remove them from the skewers.  Allow the shellac or nail polish to dry thoroughly.  You can push the ends of the skewers into a styrofoam block so that they can stand on end while the beads dry. 

Of course, this project can be made with any kind of paper.  This is also a great way to use up remnant pieces of scrapbooking or other craft paper.  You can also use paper that your kids paint or draw on.  I sometimes use my daughter's old watercolors or my son's old marker drawings.  They love the fact that their art gets to live on in a different way. 

So long as an adult cuts all of the strips, this craft is perfect for kids.  Consider it as an activity for kids' parties or mommy and me dates.  It's a great takeaway for guests.